Buying Used Whatsminer Hardware: The Complete Inspection Checklist Before You Pay
Buying used Whatsminer hardware can be a smart move to expand your mining operation without breaking the bank. However, it comes with risks. You want to make sure the hardware you’re buying is in good shape and will perform as expected. A thorough inspection checklist helps you avoid costly mistakes and guarantees your investment is sound. Whether you’re new to mining or upgrading your setup, knowing what to check before paying is essential.
Remember, buying used equipment is a balancing act. You need to verify performance, condition, and seller credibility. This guide provides a step-by-step checklist to help you navigate the process confidently and secure reliable hardware.
Understanding the importance of a comprehensive inspection
When purchasing used Whatsminer hardware, not all units are created equal. Some miners may have been overused, poorly maintained, or even damaged. A detailed inspection ensures you don’t buy a lemon. It also helps you estimate remaining lifespan and potential repair costs. The goal is to get hardware that will deliver expected hashrates and efficiency without hidden issues.
Investing time in a thorough check can save you money in the long run. It’s worth knowing what to look for, how to test performance, and when to walk away from a bad deal.
The complete inspection checklist for used Whatsminer hardware
Below is a step-by-step process to evaluate used Whatsminer ASICs thoroughly. Follow these steps carefully to make confident purchase decisions.
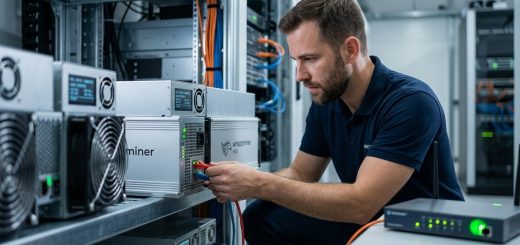
1. Physical condition and external inspection
Start with a visual check. Look for signs of damage, corrosion, or tampering. Check the enclosure for cracks, dents, or signs of water exposure. Examine connectors, ports, and cables for wear or corrosion. Ensure fans spin freely and are free of dust or debris.
Key points to verify:
- Enclosure integrity: No cracks or rust.
- Fans: Spin freely, no unusual noise.
- Connectors: Tight and undamaged.
- Power port: Firmly attached, no burn marks.
- Serial number and model label: Match the seller’s description.
Bulleted list for quick scanning:
- Exterior damage or corrosion
- Fan condition and noise
- Connector wear or damage
- Serial number verification
- Power port integrity
2. Verify serial number and model details
Serial numbers are your first line of defense. Confirm the unit’s serial matches the seller’s documentation. Use the serial number to check whether the unit is a genuine Whatsminer model and not a clone. Authenticity impacts performance and warranty eligibility.
Tip: Cross-reference the serial number on the manufacturer’s website or authorized reseller portals. Authentic units usually have clear, legible labels.
3. Power supply unit (PSU) check
The PSU is critical to stable operation. Inspect it for physical damage, burn marks, or swelling. If possible, test the PSU separately to confirm it delivers the correct voltage and wattage. A faulty PSU can cause instability or damage the miner.
Testing tips:
- Check for a clean, undamaged power cable.
- Use a multimeter to verify voltage output.
- Confirm the PSU turns on and runs quietly.
4. Internal hardware inspection
Open the miner carefully if possible. Examine the hash boards for signs of damage, burnt components, or corrosion. Look for loose or broken chips and check the heatsinks. Proper cooling is vital for performance and longevity.
Focus areas:
- Hash boards: No burnt or damaged chips
- Chips: Evenly seated and undamaged
- Heatsinks: Securely attached, free of dust
- Connectors: Firm and clean
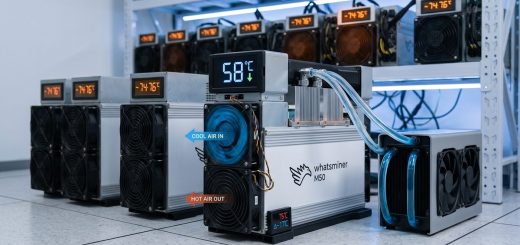
5. Fans and airflow
Fans should operate smoothly without noise. Use a flashlight to check for dust buildup or debris obstructing airflow. Poor cooling can lead to overheating and hardware failure.
Pro tip: Consider testing the fans by powering the unit on briefly. Listen for irregular noises or vibrations.
6. Firmware and software verification
Access the miner’s web interface or control panel. Confirm the firmware version installed and check for updates. Verify the miner’s reported hashrate aligns with the specifications for its model. Look out for custom or outdated firmware that might affect performance or security.
Expert advice: Always prefer factory firmware or latest official updates. Custom firmware can sometimes boost performance but may void warranties or cause instability.
7. Performance testing
Perform a hash rate check. Connect the miner to a mining pool or test network. Run the miner under normal operating conditions for at least 30 minutes to observe stability and actual performance.
Testing tips:
- Use a reliable mining pool with monitoring tools.
- Record the hashrate and power consumption.
- Compare actual results with manufacturer specs.
“Always verify the real-world hashrate against advertised figures. Significant deviations can indicate underlying issues or worn hardware,” advises mining hardware repair expert.
8. Environmental and operational history
Ask the seller for details about the miner’s previous operating environment, maintenance history, and repair records. Units used in high-temperature or dusty environments may have accelerated wear.
Questions to ask:
- How was the miner used?
- Was it operated continuously?
- Any repairs or component replacements?
- Operating temperature range?
9. Test run and stability check
If feasible, run the unit for a few hours. Monitor temperature, noise, and stability. Check for frequent crashes or overheating. This helps spot potential long-term issues.
10. Red flags and when to walk away
Be alert for warning signs such as:
- Excessive dust or corrosion
- Unusually high power consumption
- Signs of overheating or previous repairs
- Missing serial numbers or labels
- Discrepancies between claimed and actual performance
Table of common mistakes vs techniques to avoid:
| Mistake | How to avoid it |
|---|---|
| Buying units with damaged fans | Test fans during initial inspection |
| Ignoring serial number verification | Cross-check serials before purchase |
| Overlooking firmware version | Access web UI to verify and update firmware |
| Not performing performance tests | Run the miner on a pool for real-world data |
| Skipping internal hardware check | Open the unit if possible to inspect hash boards |
| Relying only on seller photos | Conduct an in-person or video inspection if available |
The art of evaluating used mining hardware
Thorough inspection goes beyond surface checks. Listening to expert advice can help you make smarter decisions.
“Patience and diligence are your best tools when buying used mining hardware. A unit that looks good externally may hide internal issues. Always verify performance under load.” — Mining hardware repair specialist.
By combining visual inspection, performance testing, and seller credibility checks, you maximize your chances of acquiring reliable, profitable hardware.
Keep your mining operation running smoothly
Once you’ve purchased a used Whatsminer, ongoing maintenance is key. Regular cleaning, firmware updates, and monitoring will extend its lifespan.
Remember, no hardware is perfect. Being vigilant and proactive helps you avoid downtime and maintain profitability.
Getting the most from your used Whatsminer investments
Applying this comprehensive checklist ensures you’re well-informed before making a purchase. It saves money, reduces risk, and boosts your confidence. Take your time to review each point carefully.
Careful evaluation is an investment itself. It pays off by delivering reliable mining performance and peace of mind. Happy mining!