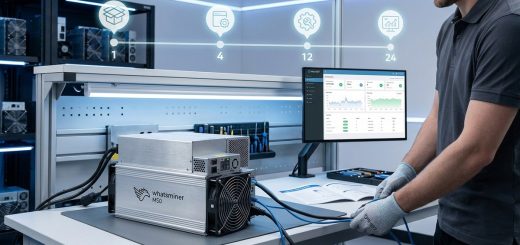
5 Must-Have Tools for Assembling Your Mining Rig Efficiently
Building a mining rig from scratch is a rite of passage for any serious crypto enthusiast. You have your ASIC miners, your power supplies, your network gear. But if your toolbox is missing the right mining rig assembly tools, you are setting yourself up for frustration, damaged hardware, and hours of rework. I have seen miners fry a brand new Whatsminer because they used a cheap screwdriver that slipped and shorted a board. Don’t be that person. Let’s walk through the five tools that will make your assembly efficient, safe, and even enjoyable.
Investing in the right mining rig assembly tools before you start saves time, prevents component damage, and ensures stable operation. The five essentials are a magnetic precision screwdriver set, an anti-static mat and wrist strap, cable management supplies (zip ties, Velcro, cable combs), a digital multimeter with PSU tester, and high-quality thermal paste with cleaning wipes. Each tool directly reduces assembly time and risk.
Start With the Right Driver Set: Your Hands Deserve Better
The first tool you reach for can make or break your build. A standard household screwdriver will not cut it. ASIC miners and GPU rigs use tiny Phillips and Torx screws that require precision. A magnetic precision screwdriver set with interchangeable bits is non-negotiable. Look for one that includes bits sized PH0, PH1, and T6 through T10. The magnetic tip holds screws in place, saving you from dropping a screw into a fan shroud or between hashboards.
Why this matters: Stripped screw heads are a nightmare. They force you to drill out the screw, which can send metal shards onto sensitive circuits. A good set costs under $20 and pays for itself the first time you avoid a stripped screw. Pair it with a ratcheting handle for faster work. Some miners also keep a small magnetic parts tray nearby. That tray catches loose screws and keeps them from rolling under your workbench.
Protect Your Investment With Electrostatic Discharge Gear
Electrostatic discharge (ESD) is the silent killer of ASIC miners. You cannot feel a 3,000 volt zap, but your hashboard can. Walking across a carpeted room in socks generates enough static to destroy a chip. The cure is a $10 anti-static wrist strap and a $15 anti-static mat.
Here is the routine:
– Place the mat on your work surface.
– Clip the wrist strap to the mat.
– Connect the mat to a grounded outlet or a metal water pipe.
– Touch a grounded metal object before handling any board.
Using these tools consistently prevents the dreaded “dead hashboard” scenario that plagues new builders. Many hobbyists skip this step, then wonder why their rig hashes at half speed after a week. Do not learn the hard way. For a deeper look at deployment pitfalls, read our guide on 7 critical mistakes to avoid when deploying your first Whatsminer rig.
| Tool | Common Mistake | Correct Practice |
|---|---|---|
| Screwdriver | Using a non-magnetic bit that slips | Magnetic precision set with PH0, PH1, T6-T10 |
| Anti-static gear | No wrist strap, just touching case once | Wrist strap + mat, grounded continuously |
| Cable ties | Over-tightening and crimping wires | Zip ties + Velcro; leave slight slack |
| Multimeter | Only testing voltage once | Test at PSU output and at each riser cable |
| Thermal paste | Applying too much or reusing old paste | Pea-size drop; clean surfaces first |
Cable Management Tools: Keep Airflow and Sanity Intact
A tangle of power cables looks messy, but the real cost is poor airflow and accidental disconnections. When you have six GPUs or a stack of Whatsminers, each unit pulls 3,000 to 4,000 watts. Those thick 10 AWG wires need to be routed cleanly. Your cable management toolkit should include:
- Nylon zip ties in assorted lengths (4-inch and 8-inch work best). Use them to bundle cables behind the rig frame.
- Velcro straps for sections you may adjust later. Velcro lets you re-route wires without cutting ties.
- Cable combs if you are using custom sleeved cables. Combs keep individual wires parallel and neat.
- Labeling tape to mark each PSU cable by its circuit breaker. When a breaker trips, you can trace the problem immediately.
We cover power infrastructure in detail in our article on building the perfect power infrastructure for multi-ASIC deployments. But a simple rule: never run power cables over fan intakes. Use zip ties to secure cables to the frame rails instead. This single change can lower operating temperatures by 2 to 3 degrees Celsius because the fans face less obstruction.
The Digital Multimeter: Your Eyes for Electricity
You can assemble a rig without a multimeter, but it is like driving a car without a dashboard. A basic digital multimeter costs $15 and lets you check:
– PSU output voltages at the 12V and 5V rails.
– Continuity in cables and risers.
– Resistance to spot a short before you power up.
Add a PSU tester (also called a power supply tester) to your box. This handy device plugs into the 24-pin ATX connector and gives you a readout of all rails at once. It saves you from connecting a multimeter probe to each pin. I recommend testing each new PSU before it ever touches a miner. Many faulty units pass visual inspection but fail under load.
How to use it during assembly:
1. Unbox the PSU and plug it into the tester.
2. Turn on the PSU (jump the green and black pins if necessary).
3. Verify all voltages are within 5% of spec.
4. Repeat the test after you have connected all cables to the rig.
This process catches loose crimps and bad connectors before they can damage a board. If you are curious about how different ASIC models compare on power efficiency, check our Whatsminer vs Antminer S19: side-by-side comparison for mining farm operators.
Expert tip from a mining farm operator: “Always test your PSU with a dummy load or a known good rig before connecting expensive ASICs. I have seen two brand new 3,000W units deliver fluctuating voltages that would have fried a hashboard. The multimeter and PSU tester together cost less than 1% of a single Whatsminer M60. There is no excuse not to use them.”
Thermal Paste and Cleaning Supplies: Keep Chips Cool
Even if your ASIC miner arrives with pre-applied thermal paste, you will eventually need to reapply it. Over time, the paste dries out or gets contaminated during maintenance. A small tube of high-performance thermal paste, like Arctic MX-6 or Noctua NT-H2, is a must. Pair it with isopropyl alcohol (90% or higher) and lint-free wipes to clean old paste.
When to replace thermal paste:
– After the first 12 months of continuous operation.
– Whenever you remove a heat sink for any reason (firmware mods, cleaning, inspection).
– If you notice core temperatures rising 5 degrees Celsius above normal despite clean fans.
To apply, clean both surfaces with alcohol, wait for it to dry, then place a pea-sized drop in the center of the chip. Press the heat sink down evenly. Do not spread the paste yourself; the pressure will do it. This simple step can drop operating temperatures by 3 to 7 degrees Celsius, directly improving efficiency and lifespan.
For more on maintaining your equipment over the long haul, read our extending Whatsminer lifespan: maintenance schedules and component upgrades that actually work.
Your Assembly Workflow in Three Simple Steps
Putting these tools together, your assembly process should follow this order:
- Prep your workspace. Lay out the anti-static mat, put on your wrist strap, and set out your driver kit, multimeter, and thermal paste.
- Test components before assembly. Use the multimeter and PSU tester on every power supply. Check that each cable is continuous. If you are using risers, test them too.
- Build and manage cables. Mount the miner, connect power cables using zip ties and Velcro, then apply thermal paste if needed. Do a final voltage check at the board connectors before powering on.
Stick to this workflow and you will reduce build time by at least 30 percent compared to a haphazard approach. You will also have fewer post-build failures.
Avoid These Three Assembly Pitfalls
Even with the right mining rig assembly tools, beginners make avoidable mistakes. Here are three to watch for:
- Using too much force when tightening screws. Hashboards are fragile. Use a finger-tight grip, then a quarter turn with the screwdriver.
- Skipping the anti-static strap. Static can jump even if you think you are safe. Build on a hard floor, not carpet.
- Neglecting cable strain relief. Heavy power cables dangling from connectors can crack solder joints. Use zip ties to anchor cables to the frame near each connection point.
These pitfalls often lead to intermittent hashrate problems that are hard to diagnose. If you run into issues after assembly, our guide on why your whatsminer keeps disconnecting from the pool and how to fix it permanently can help.
What Your Tool Kit Costs vs the Value It Protects
Here is a honest cost breakdown. You can buy all five essential tools for under $80 total:
- Precision screwdriver set: $15
- Anti-static mat and wrist strap: $20
- Cable management supplies (100 zip ties, 10 Velcro straps, label tape): $15
- Digital multimeter and PSU tester: $25
- Thermal paste and cleaning wipes: $10
Compare that to the price of one replacement hashboard for a Whatsminer M50 series, which runs $300 to $500 used. The math is obvious. Using the right tools is not an expense; it is an insurance premium on your mining investment.
Your Next Build: Tools Ready, Confidence Higher
Building a mining rig is one of the most satisfying steps in your crypto mining journey. When you have the right mining rig assembly tools in hand, you stop worrying about breaking things and start enjoying the process. A magnetic screwdriver, an anti-static strap, cable organizers, a multimeter, and fresh thermal paste give you a smooth build and reliable operation for months to come.
Gather those tools before your next unboxing. Lay out your workspace. Follow the workflow. Your future self, the one who does not have to troubleshoot a dead board at 2 AM, will thank you. If you want to dig deeper into choosing the best hardware for your setup, see our guide on which ASIC miner delivers the best j/TH efficiency in 2026.