How to Stress-Test an ASIC Miner Before You Buy: A 5-Step Checklist for 2026
Buying an ASIC miner in 2026 is a serious investment. Whether you are picking up a used Whatsminer M60 or a brand new Antminer S21 Pro, the difference between a profitable rig and a paperweight often comes down to what happens before you hand over your money. A proper stress test catches failures that a seller might not even know about. And in a market where margins are tight and downtime eats directly into your ROI, you cannot afford to skip this step.
A five step stress test protects your mining investment by verifying real hashrate, power draw, thermal stability, firmware integrity, and hash board health. Run these checks before purchase to avoid hidden failures, estimate true profitability, and negotiate from a position of hard data instead of trust.
Why a stress test matters more in 2026
The days of easy margins are behind us. Mining difficulty hit an all time high, and every joule per terahash counts. A unit that runs 5 degrees hotter than spec will cost you more in cooling and electricity over its lifespan. A miner with a failing hash board might still boot up and show a hashrate for a few minutes, only to throttle or crash after an hour. That is the kind of failure a simple visual inspection will never catch.
A structured stress test simulates real operating conditions. It pushes the hardware to its limits in a controlled way so you can see exactly what you are getting. This checklist gives you a repeatable process that works whether you are testing a single unit in a garage or a pallet of miners at a hosting facility.
Step 1: Verify real hashrate against advertised specs
Every ASIC miner comes with a rated hashrate, but real world performance rarely matches the marketing numbers. Temperature, firmware version, power supply quality, and even the mining pool you test on can all affect the result.
What to do:
- Connect the miner to a known good power source and a stable internet connection.
- Let it run on a standard mining pool for at least 30 minutes. Do not use a benchmarking tool that runs locally; you want real pool data.
- Record the average hashrate shown in the pool dashboard. Compare it against the manufacturer spec.
A deviation of more than 3% to 5% is a red flag. For example, if a Whatsminer M50 is rated at 120 TH/s but you see 112 TH/s after 30 minutes, something is off. It could be thermal throttling, a bad hash board, or incorrect firmware settings. Do not accept excuses like “it needs to warm up.” A healthy miner hits its rate within the first 15 minutes.
If you want a deeper understanding of how specific models perform under load, check out our Whatsminer M50 Series Complete Breakdown: Performance Testing and Real-World Results. That article breaks down exactly what to expect from each variant.
Step 2: Measure real power consumption at the wall
Power draw is the second most important metric after hashrate. A miner that pulls 50 watts more than spec will eat into your profit every single day. Over a year, that extra draw can cost hundreds of dollars in electricity.
What to do:
- Use a plug in watt meter. A Kill A Watt or a P3 P4400 works fine for single units.
- Record the reading after the miner has been running at full load for 20 minutes.
- Compare against the manufacturer’s rated power consumption.
If the advertised spec says 3400W but your meter shows 3650W, that miner is inefficient. It might also indicate a failing power supply that is running hotter than it should. For a breakdown of which models deliver the best efficiency, read Which ASIC Miner Delivers the Best J/TH Efficiency in 2026?
| Metric | What to look for | Red flag |
|---|---|---|
| Hashrate | Within 3% of advertised spec | More than 5% below spec |
| Power draw | Within 50W of rated spec | More than 100W above rated |
| Temperature | Under 75 degrees Celsius | Over 85 degrees Celsius |
| Fan speed | Below 80% at steady state | Running at 100% constantly |
Step 3: Run a 2 hour thermal stability test
Heat is the number one killer of ASIC miners. A unit that runs hot will degrade faster, throttle more often, and cost more to cool. The goal here is to see if the miner can hold a stable temperature under continuous load.
What to do:
- Let the miner run for a full 2 hours on the pool.
- Log the temperature every 15 minutes. Most miners have a web interface or an API that shows chip and ambient temps.
- Look for a steady curve. Temperatures should rise quickly in the first 30 minutes, then plateau.
If the temperature keeps climbing past the 90 minute mark, the cooling system is insufficient. That could mean clogged air filters, a failing fan, or poor thermal paste application on the hash boards.
A miner that hits 85 degrees Celsius or higher is a risk. It might still hash fine today, but it will likely fail before its expected lifespan. For more on how heat affects longevity, see 7 Critical Build Quality Issues That Kill ASIC Miner Longevity.
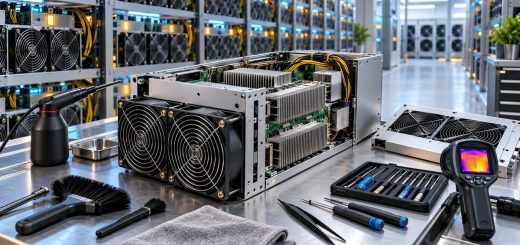
Expert tip: Bring an infrared thermometer. Point it at the exhaust vents and the power supply casing. If the PSU casing is too hot to keep your hand on, that power supply is working too hard. It will fail eventually.
Step 4: Inspect firmware version and configuration
Firmware controls everything from fan curves to voltage regulation. A miner running outdated or custom firmware might behave unpredictably. Some aftermarket firmware versions boost hashrate at the cost of stability. Others introduce bugs that cause random reboots.
What to do:
- Log into the miner’s web interface or SSH terminal.
- Check the firmware version against the manufacturer’s latest release.
- Look for any custom settings like overclocked core frequencies or disabled safety limits.
If the seller installed custom firmware, ask why. Some miners are fine tuned for specific pools or cooling setups. Others are pushed beyond safe limits to inflate the hashrate for a quick sale.
Stock firmware is usually the safest bet for a stress test. If the unit has custom firmware, consider flashing it back to stock before making a final decision. Our guide How to Flash Custom Firmware on Your Whatsminer Without Bricking It walks through the process step by step.
Step 5: Check each hash board individually
Most modern ASIC miners use multiple hash boards working in parallel. If one board is failing, the miner might still show a decent total hashrate, but it will be unstable and prone to sudden drops.
What to do:
- Access the miner’s detailed status page. Most manufacturers list the hashrate and temperature per board.
- Run a 10 minute benchmark while watching each board’s output.
- Note any board that shows significantly lower hashrate or higher temperature than the others.
A difference of more than 10% between boards indicates a problem. It could be a loose connection, a failing chip, or a cooling issue specific to that board.
If you see one board running 10 degrees hotter than the rest, that miner needs repair before it goes into production. Do not assume the issue will fix itself. It will only get worse.
Common mistakes to avoid during testing
Even experienced miners make errors during stress tests. These are the most common ones we see:
- Testing for only 10 minutes. Short tests miss thermal issues. You need at least 2 hours.
- Using the wrong power cable. A 15 amp cable on a 20 amp miner can cause voltage drop and inaccurate readings.
- Ignoring ambient temperature. Test in a room that matches your planned operating environment. A miner that runs cool in a 65 degree basement might overheat in a 75 degree garage.
- Skipping the network check. A flaky ethernet cable can cause the miner to drop from the pool, making the hashrate look unstable when the hardware is actually fine.
For a broader list of pitfalls that apply to any setup, read 7 Critical Mistakes to Avoid When Deploying Your First Whatsminer Rig.
What to do if the miner fails a test
A failed stress test does not always mean you should walk away. It depends on the severity of the issue and the price you are paying.
Minor issues:
- Fan running at 100% but temperatures are still acceptable: Replace the fan. It is a cheap fix.
- One hash board slightly underperforming: Negotiate a discount. A single board replacement costs less than a full unit.
- Power draw 30W over spec: Accept it if the price is right, but factor the extra cost into your Whatsminer Profitability Calculator: How Long Until Your Investment Breaks Even?
Major issues:
- Hashrate more than 10% below spec: Walk away. The problem is likely internal and expensive to fix.
- Temperature exceeds 85 degrees Celsius: Hard pass. The miner has been abused or has a systemic cooling failure.
- Custom firmware with no stock backup: Consider it only if you are comfortable reflashing and testing again.
How to document your test results
Bring a notebook or a spreadsheet on your phone. Record the following for every unit you test:
- Model and serial number
- Firmware version
- Average hashrate after 30 minutes
- Power draw at the wall
- Peak temperature during the 2 hour test
- Individual board hashrates
- Any error messages from the pool dashboard
This data gives you leverage in negotiations. If you can show a seller that their miner draws 100W more than spec, you have a solid reason to ask for a lower price. It also helps you compare multiple units side by side so you pick the best one.
The payoff of a thorough stress test
A proper stress test takes about 3 hours from start to finish. That is a small investment when you are spending several thousand dollars on a single miner or tens of thousands on a batch. The time you spend testing is time you do not spend later dealing with hardware failures, lost hashrate, and shipping costs for returns.
In 2026, the difference between a profitable mining operation and a money losing one often comes down to hardware quality. Sellers know this, and some will try to offload problem units on buyers who do not test. Do not be that buyer.
Take this checklist with you. Run each step. Trust the data, not the story. And when you find a unit that passes every test, you can buy with confidence knowing it will earn from day one.