How to Benchmark Your Whatsminer for Real-World Hashrate Accuracy
You just unboxed a brand new Whatsminer. The spec sheet says 112 TH/s. You plug it in, point it at your pool, and wait. The dashboard shows 110 TH/s. Maybe 108 TH/s. Is that normal? Are you leaving money on the table? Or worse, did you get a dud? This is the exact moment when knowing how to run a proper Whatsminer benchmark separates the operators who optimize from those who just hope. Let’s fix that.
A reliable Whatsminer benchmark requires more than a glance at the pool dashboard. You need a controlled environment, the right firmware settings, a clean power supply, and at least 24 hours of stable data. This guide walks you through the entire process to measure real hashrate, spot performance issues early, and get your machine running at its advertised capacity.
Why Your Pool Dashboard Is Lying to You
Most miners make their first mistake before the benchmark even starts. They trust the hashrate number on their pool’s website. That number is an average across all shares submitted over a window of time. It includes network latency, share difficulty variance, and even pool-side rounding. It is not your machine’s actual hashrate.
Your Whatsminer’s own web interface reports a “hashrate” too. But that number is calculated from the chip frequency and the number of working hash boards. It does not account for rejected shares, hardware errors, or thermal throttling. In short, both numbers are useful for a rough check, but neither is precise enough for a real benchmark.
A proper Whatsminer benchmark measures the work your machine actually completes. It filters out pool noise. It catches hardware problems early. And it gives you a baseline you can trust when you start tuning or troubleshooting.
The Tools You Need Before You Start
Before you run any tests, gather these items. Missing one can skew your results.
- A dedicated power meter (like a P3 P4400 or a smart plug with energy monitoring). Do not rely on the power reading from the miner’s web interface. It is often inaccurate.
- A laptop or desktop on the same local network as your miner.
- The IP address of your Whatsminer. Find it from your router’s DHCP list or use the IP reporter tool from MicroBT.
- The latest stock firmware for your model. Download it from the official MicroBT support page. Do not use beta or custom firmware for a baseline benchmark.
- A stopwatch or timer on your phone.
- A notepad or a spreadsheet. You will record data every hour.
Step-by-Step Benchmark Process
Here is the exact process I use when I test a new Whatsminer or investigate a performance complaint. Follow these steps in order.
-
Set up the physical environment. Place the miner in a location with stable ambient temperature between 20 and 25 degrees Celsius (68 to 77 degrees Fahrenheit). Ensure the intake and exhaust are clear. No obstructions within 12 inches of the fans. Use a dedicated 240V circuit if possible. A shared circuit with other miners can introduce voltage drop that reduces hashrate.
-
Flash the latest stock firmware. Log into the miner’s web interface. Go to the firmware update page. Upload the official firmware file. Wait for the miner to reboot. This takes about 3 minutes. Confirm the firmware version matches the release notes on MicroBT’s site.
-
Reset to factory defaults. After the firmware update, perform a factory reset. This clears any leftover settings from the previous owner or from previous tuning attempts. You want a clean slate.
-
Configure your pool settings. Enter your pool URL, worker name, and password. Use a pool that offers a low-latency stratum server close to your geographic region. For US-based miners, use a pool with servers in Texas or Ohio. High latency inflates stale shares and makes your hashrate look lower than it is.
-
Let the miner warm up for 30 minutes. The hash boards need time to reach thermal equilibrium. During this warm-up period, the fans will ramp up and the hashrate will fluctuate. Do not record data yet.
-
Record data every hour for 24 hours. For each hour, note the following:
- Reported hashrate from the miner’s web interface (in TH/s).
- Pool-side hashrate (from your pool dashboard).
- Accepted shares count.
- Stale shares count.
- Hardware error rate (HW errors).
- Chip temperature (average across all hash boards).
- Power consumption from your external power meter (in watts).
-
Ambient temperature in the room.
-
Calculate your real average hashrate. At the end of 24 hours, use this formula: (Total Accepted Shares * Share Difficulty * 2^32) / (Time in Seconds). Most pools report share difficulty. If your pool does not display it, use 1 for the default. This calculation gives you your true hashrate in hashes per second. Convert to TH/s by dividing by 10^12.
What Good Results Look Like
Your real average hashrate should be within 2% of the advertised spec for your model. For example, a Whatsminer M50S advertised at 126 TH/s should deliver between 123.5 and 126 TH/s over a 24-hour average.
Your hardware error rate should be below 0.01%. Anything higher suggests a problem with one of the hash boards, the power supply, or the firmware.
Your power consumption should match the spec sheet within 5%. If you see 10% higher power draw with no increase in hashrate, you have an efficiency problem.
Common Benchmark Mistakes and How to Avoid Them
| Mistake | What Happens | How to Fix It |
|---|---|---|
| Benchmarking for only 1 hour | Short-term variance from pool luck skews results | Run for at least 24 hours |
| Using pool hashrate as the only metric | Pool averages hide hardware issues | Cross-reference with miner-reported hashrate and share count |
| Not measuring power at the wall | Miner-reported power is often wrong | Use an external power meter |
| Testing with custom firmware first | You don’t know if the baseline is good | Always test with stock firmware first |
| Ignoring ambient temperature | High temps cause thermal throttling | Keep room temp below 25 degrees Celsius |
| Skipping the warm-up period | Cold chips run at different efficiency | Wait 30 minutes before recording |
When Your Hashrate Is Lower Than Expected
If your 24-hour average is more than 2% below the spec, do not panic. Work through this checklist.
- Check your power supply voltage. Use a multimeter at the PSU terminals. You want 12.0 to 12.5 volts DC under load. Low voltage reduces chip performance.
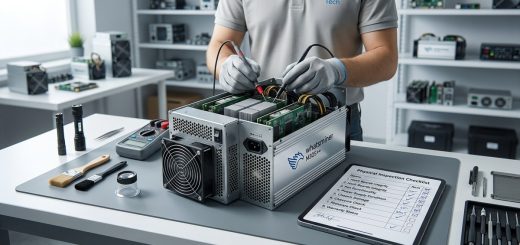
- Inspect the hash boards for physical damage. Look for burnt components, bulging capacitors, or loose cables.
- Update the firmware again. Sometimes an update does not apply cleanly. A second flash can fix it.
- Test each hash board individually. If your miner has three boards, try running with only two. Identify which board underperforms.
- Check your network connection. A bad ethernet cable or a congested switch can cause stale shares that look like low hashrate.
Expert advice: If you find a single bad hash board, you can often replace it yourself. MicroBT sells replacement boards for most models. But before you buy, try reseating the data ribbon cable. A loose connection causes the same symptoms as a dead board.
How to Benchmark After Firmware Changes
Once you have a solid baseline with stock firmware, you can test custom firmware or tuning profiles. The process is the same, but you need to compare apples to apples.
Run the same 24-hour test after every firmware change. Record all the same metrics. Compare the new results to your baseline. Look for three things:
1. Did the real hashrate increase?
2. Did the power consumption change?
3. Did the hardware error rate stay low?
A custom firmware that boosts hashrate by 5% but increases power by 10% is not a win. You want better efficiency, not just more speed.
If you are interested in which models give you the best bang for your watt, check out our breakdown of the top MicroBT Whatsminer models for 2026.
Moving from Benchmark to Optimization
A benchmark is not a one-time event. Run it every time you change firmware, every time you move the miner to a new location, and at least once a quarter for ongoing health checks.
Keep a logbook for each machine. Write down the baseline results, the date, and the firmware version. When you see a performance drop months later, you can compare against that log to see if the issue is new or if it was always there.
For large farms, automate the data collection. Use a script that pings the miner’s API every hour and writes the results to a database. Tools like Awesome Miner or custom Python scripts can handle this for 100+ units. But even for a single miner, manual logging for one day is worth the effort.
The Real Cost of Skipping a Proper Benchmark
Let’s put some numbers on this. Suppose you have a Whatsminer M50S that should do 126 TH/s. You skip the benchmark. The miner runs at 118 TH/s because of a loose power cable. That is a 6.3% loss.
At $0.07 per kWh and a Bitcoin price of $60,000, that miner earns about $6.50 per day at full speed. At 118 TH/s, it earns about $6.10 per day. That is $0.40 per day lost. Over a year, that is $146 in missed revenue. For a single machine.
Now multiply that by 50 units in your farm. You just lost $7,300 in a year because you did not spend one day running a benchmark. The math is brutal.
If you want to understand the full picture of what your hardware should earn, use our Whatsminer profitability calculator to run the numbers with your real hashrate data.
Putting Your Benchmark Results to Work
You have your real hashrate. You know your power draw. Now you can make informed decisions.
If your machine is underperforming, you know exactly where to look. If it is running at spec, you have peace of mind. If you are considering an upgrade, you have real data to compare against newer models.
Benchmarking also helps you spot degradation over time. ASIC chips wear out. Fans lose RPM. Power supplies drift. A quarterly benchmark catches these issues before they cost you weeks of lost revenue.
Building a Culture of Accuracy in Your Operation
The best mining farm operators do not guess. They measure. They log. They compare. Running a proper Whatsminer benchmark is the first step toward that discipline.
Start with one machine. Do the full 24-hour test. Record everything. Then do it for the next machine. And the next. Within a week, you will have a baseline for your entire farm.
Once you have those baselines, you can start tuning. You can experiment with undervolting your Whatsminer firmware to cut power costs. You can test overclocking safely for extra hashrate. But none of that matters if you do not know where you started.
Run the benchmark. Trust the data. Let your results guide every decision from here.
And if you ever feel unsure, remember this: a miner that is not benchmarked is a miner that might be losing you money. You now have the exact process to find out. Use it.